Quick Guide for Entering Invoiceable Items in SMART

Download as PDF
Follow the standard process for entering enrollment data in SMART.
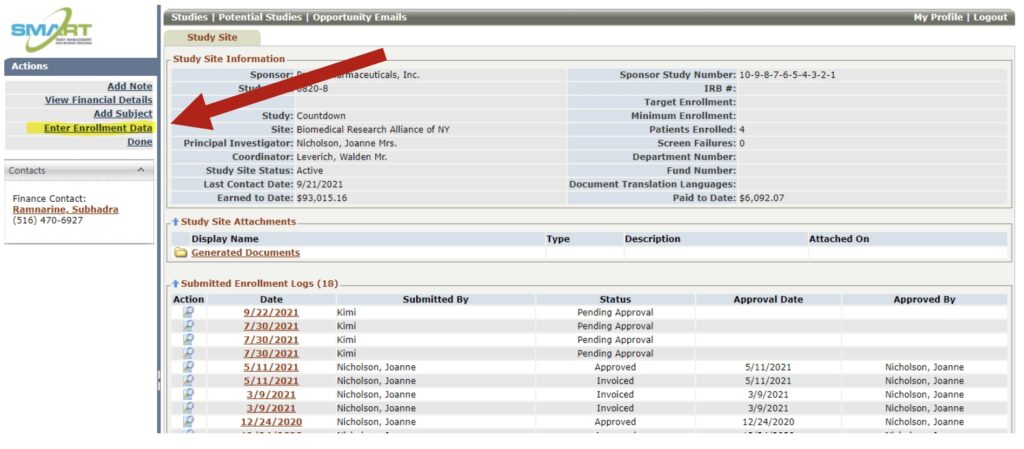
1. Select a study from the study list in your dashboard.
2. Click “Enter Enrollment Data”.
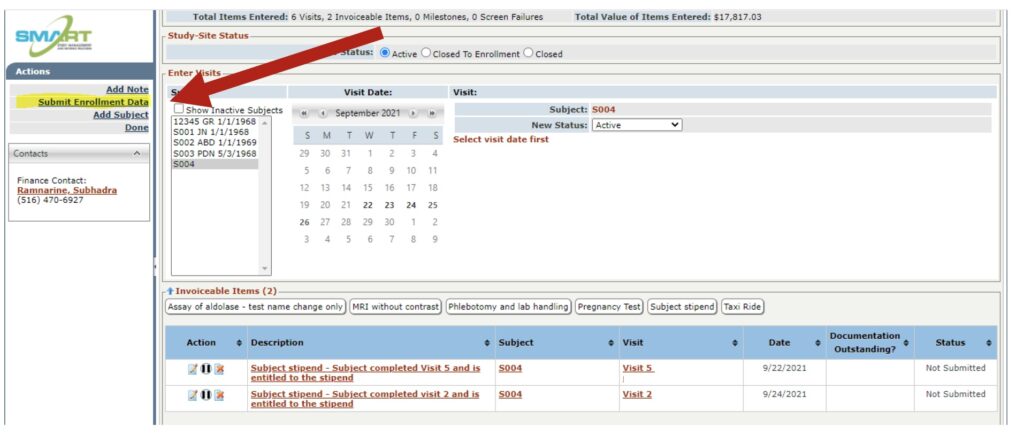
3. On the “Enter Subject Visits” screen, Invoiceable Items for the study will appear just below the “Enter Visits” section.

There are two ways to enter Invoiceable Items.
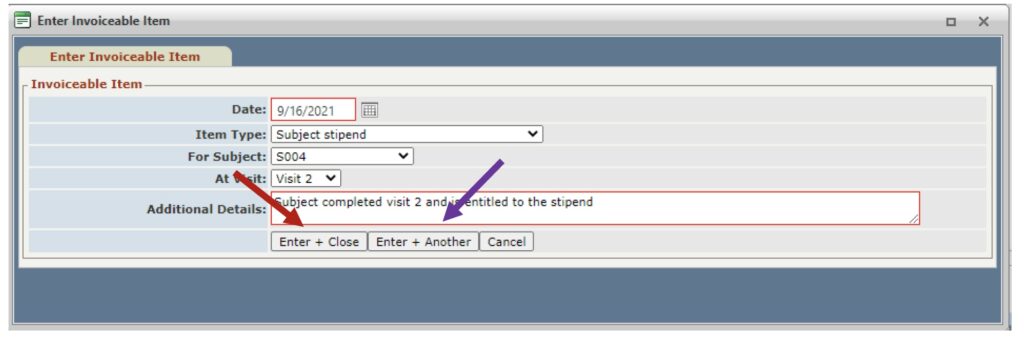
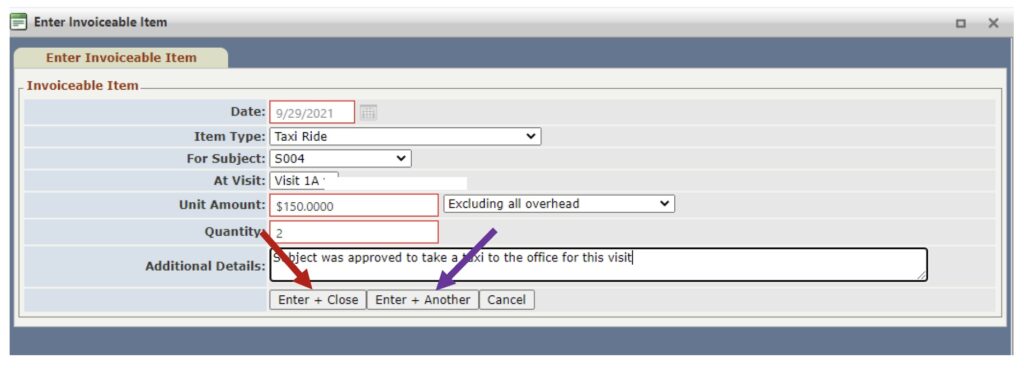
4. The first is to select the invoiceable from the list of invoiceable items shown in this section.

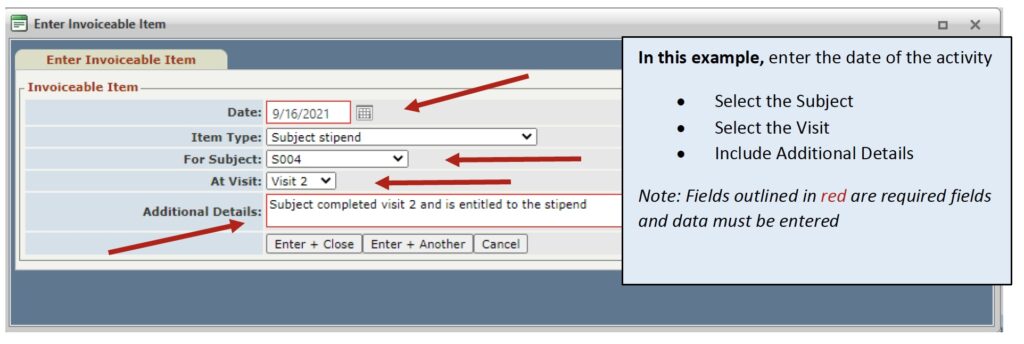
5. The data entry screen will open, and you will fill in the specific information required for that invoiceable item.
6. Once data entry is complete, select “Enter + Another” if you have an additional invoiceable item to enter, or select “Enter + Close”.
Let’s try another! Depending on the type of invoiceable item you are entering there will be varying data elements required. This guide includes are just a few examples.
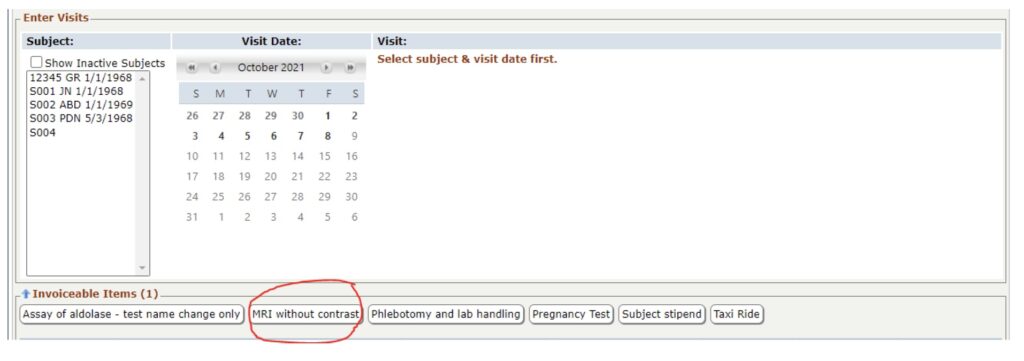
1. Select the invoiceable item from the list of invoiceable items shown.
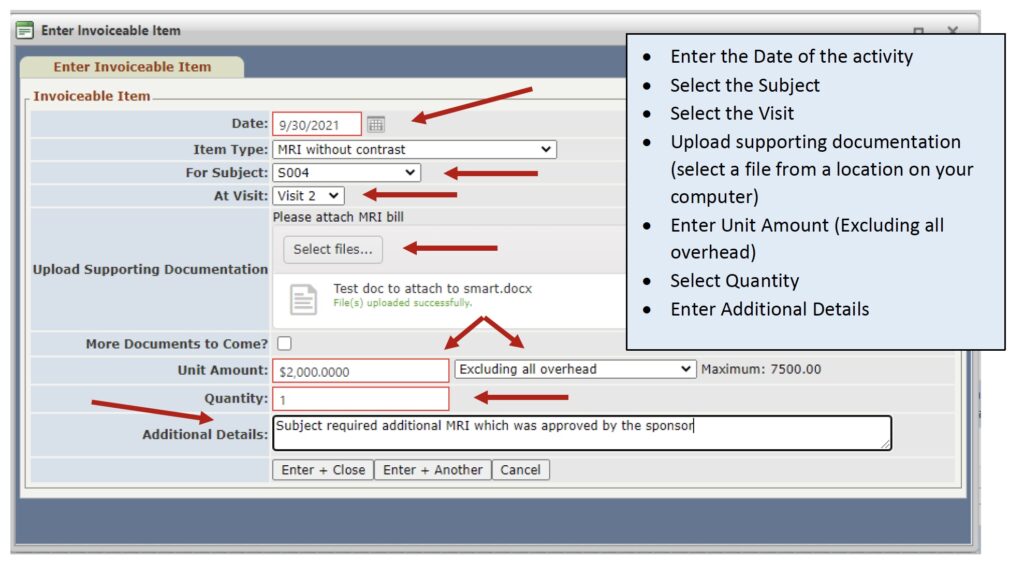
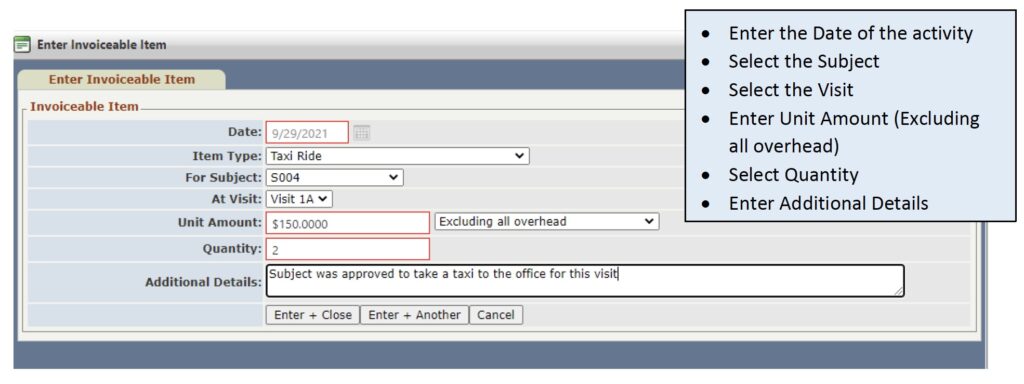
2. The data entry screen will open, and you will fill in the specific information required for that invoiceable item. In this example, MRI without contrast, in addition to selecting the subject and visit, documentation must be attached, and the Unit Amount must be entered. When entering the Unit Amount, “Excluding all overhead” should also appear next to the Unit Amount.
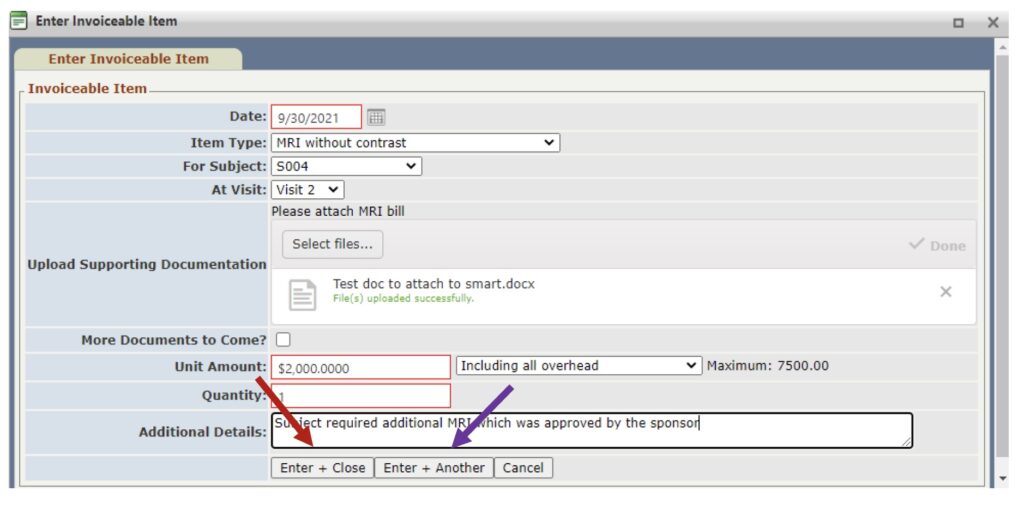
3. Once data entry is complete, select “Enter + Another” if you have additional invoiceable items to enter, or select “Enter + Close”.
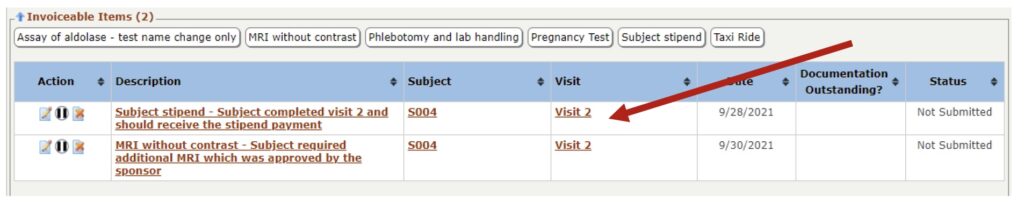
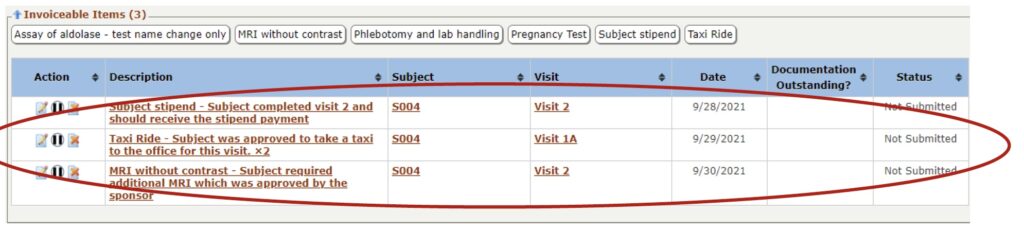
4. You will see the items you entered listed below the Invoiceable Items list.
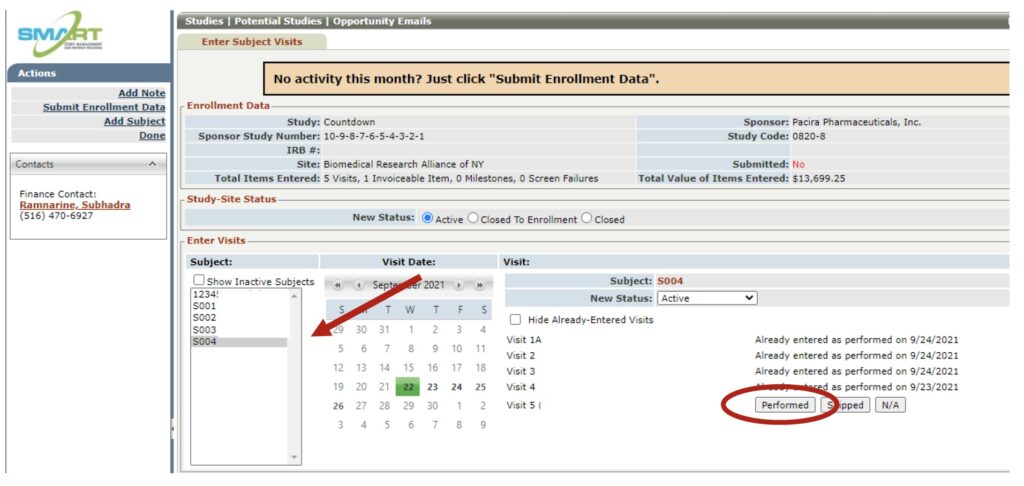
The second way you can enter Invoiceable Items is when you are entering visits for a subject.
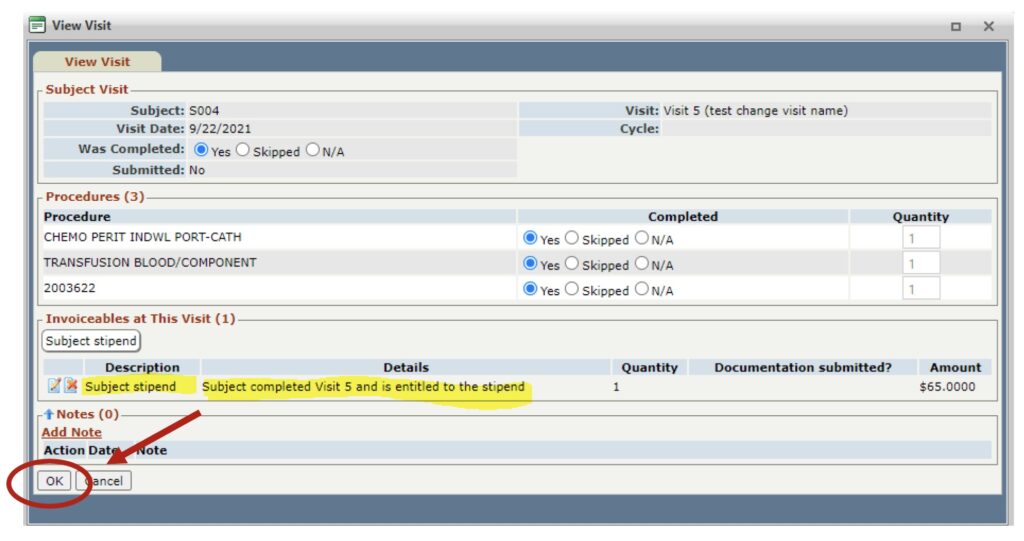
1. Select the Subject and the Visit Date. Click – Performed.
2. The Invoiceable items that are available for this visit will be listed under “Invoiceables at This Visit”.
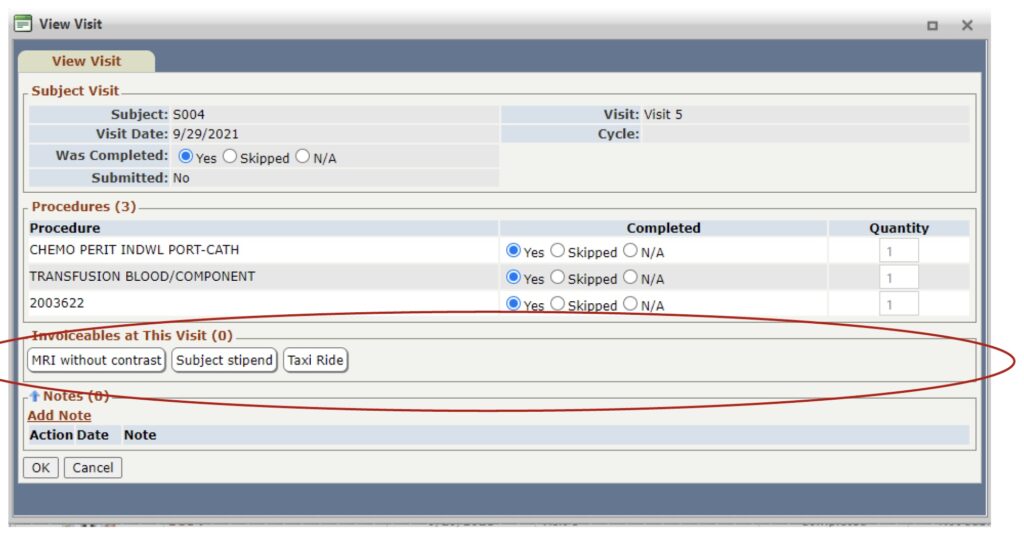
3. When you select an invoiceable item, the data entry screen will open, and you will fill in the specific information required for that invoiceable item.
4. Once data entry is complete, select “Enter + Another” if you have additional invoiceable items to enter, or select “Enter + Close”.
5. You will see the items you entered listed below “Invoiceables at this Visit”. Click – OK.
6. You will see the items you entered listed below the Invoiceable Items list.
7. Once all enrollment data is entered Click – Submit Enrollment Data.